
Hello all,
Today I will talk about a Ukrainian embroidery style which is found over a large part of central and eastern Ukraine, but is particularly associated with the Poltava region. This can be seen in the image above, which shows the shoulder inset and upper sleeve of a chemise from the Poltava area. It combines flat stitch, hemstitching, faggot stitching, eyelets, decorative joining and gathering with cutwork. Cutwork was possibly invented by the Byzantines, but has spread all over Europe, being found in Greece, Hungary, Transylvania, and Norway among other places, as well as Ukraine.
The best known style of cutwork in the west today is modern Hardanger style. There are similarities but also important differences between the two styles. Here is an image that shows the details of the Ukrainian style, called Vyrizuvannia.

Anyone who regularly does Hardanger will immediately see the difference. Modern Hardanger is built on the concept of 'kloster blocks', that you lay down blocks of satin stitch which forms the basis of the design. Here is one blog which will show you step by step how to do it.
http://aimetuhardangertutorial.blogspot.com/2009/07/kloster-blocks.html


To the Ukrainian eye, this looks very klunky and coarse. For the Poltava embroiderer, the main focus of the design are the cut out openings, and this is what is emphasized. Instead of laying wide blocks that lie flat on the fabric, we make relatively narrow overcast bars, just enough to hold the threads in place when the fabric is cut. Here is a chart of a similar motif done in Ukrainian style. We also put cross stitches in the corners to secure them, and use both finer cloth and floss than those who do modern Hardanger. They often use panama cloth and cotton perle, whereas Ukrainian embroiderers prefer to use a fine linen and either DMC 'brilliant' one stranded floss [which unfortunately is difficult to find anymore], or mouline, usually divided.

In this example, the embroiderer chose to do the overcasting over three threads and left five threads for each side of the cutouts. You will see Ukrainian cutwork done over three and three, but the overcast stitches are drawn tight, as in faggoting work, and the result is that the openings appear larger than the overcasting. This is the case in the photo above. Here is a closeup. If you look carefully you can see that the bars and cutouts each have three threads.

Here are a couple more examples.

In this image, counted satin stitch is used as an adjunct, which is very common. When modern floss, which has a certain sheen, is used, it reflects the light differently when viewed horizontally or vertically. The two half stars are executed in the same color, but they look different in the photo because of the way they catch the light. Some people are deceived by this and use two different shades. THAT IS INCORRECT. Use the same color for the entire star, or whatever the motif is.

In this example, the bars are done over three threads and four are left for the cutouts.

This is the basic difference between Poltava work and modern Hardanger. You will also notice that while Ukrainians tend to use three threads for the bars, Hardanger will often use four, so that they can weave the bars in the center instead of overcasting them. Many of the motifs and compositions are similar, although there are some which one style uses but the other does not. If you need the process broken down, feel free to look at the blog link above.
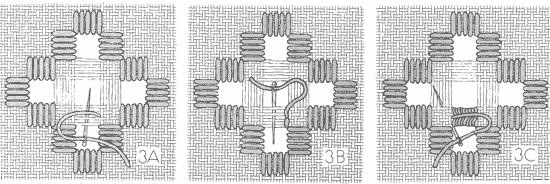
The first step is to design the composition, decide how many threads will be used for the overcast bars and for the openings. Then decide the placement of the other elements of the design. Then figure out how they will fit together, and how many threads of cloth you will need. figure out how many threads per inch, and put it together. I strongly recommend that you put your own project together; there is no need to copy someone else's project. In Ukraine, and in all traditional cultures, people made their own compositions using the traditional vocabulary.
Secondly, now that you have decided where each motif will go, start by securing the outline of the cutwork motifs, as shown in the schematic above.


Once the outline has been secured, then you cut all the threads that are secured by the overcasting bars, being very careful not to cut the ones which are covered by the bars. These threads must be pulled out.

This leaves a lattice of threads which connect across the open area where the bars secure the ground threads. It is very important that you make sure that the same threads are secured on both sides of the motif.
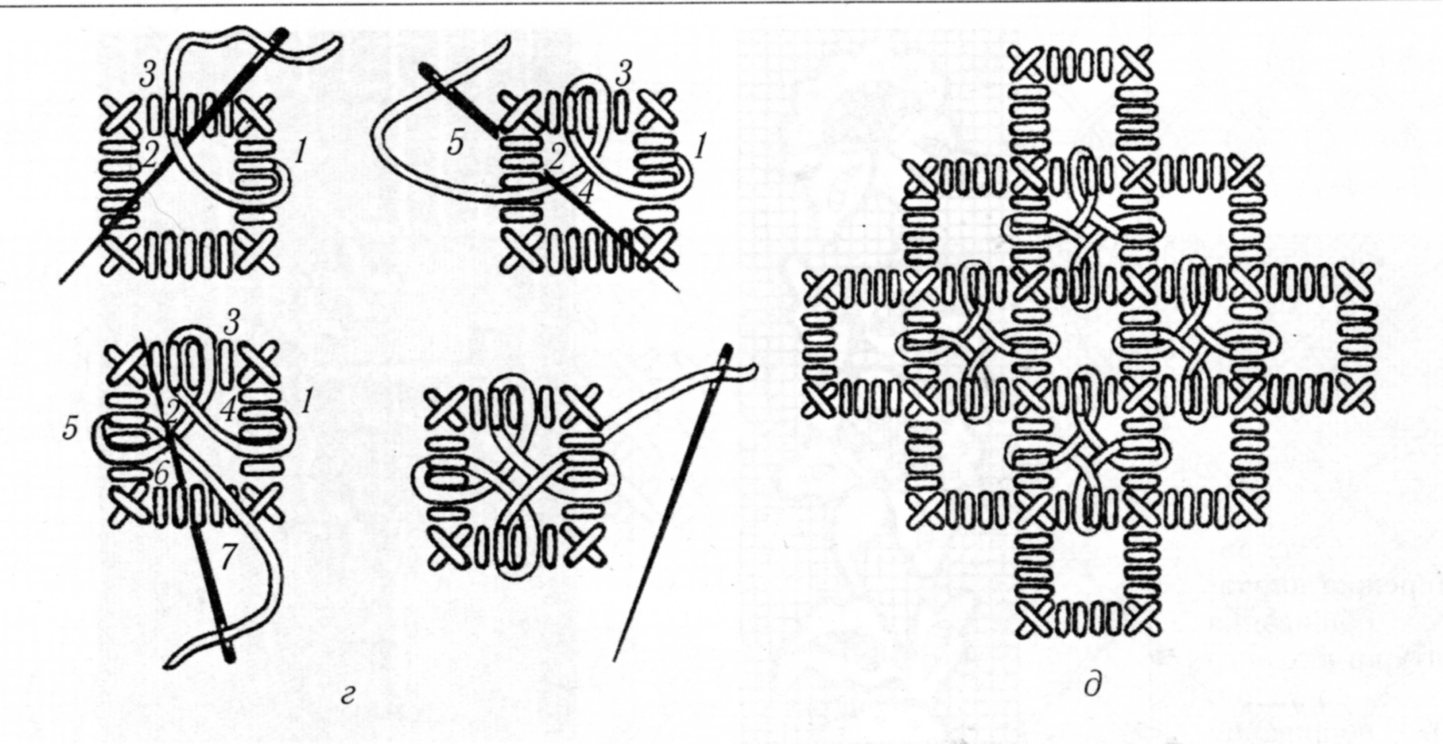
The interior threads must now be overcast as well. The arrows in the graphic show the recommended route. Usually all squares which do not border one of the overcast bars is strengthened and ornamented, most commonly by the cloverleaf shown here, but other options exist.
If you have never tried this before, I strongly recommend that you practice a motif like this on a sampler. You can use videos or books on Hardanger, as long as you ignore what they say about 'blocks'.
Here is how this motif looks when finished and embellished with other stitches.


This technique is never used in isolation, but is always combined with other stitches, most notably counted satin stitch 'lyshtva', faggot stitching 'zernovyj vyvid', braid stitch 'retiaz', hemstitching 'merezhka', and others. The area cut out may consist of single squares, or a zigzag of openwork which extends the length of the piece, or anything in between.
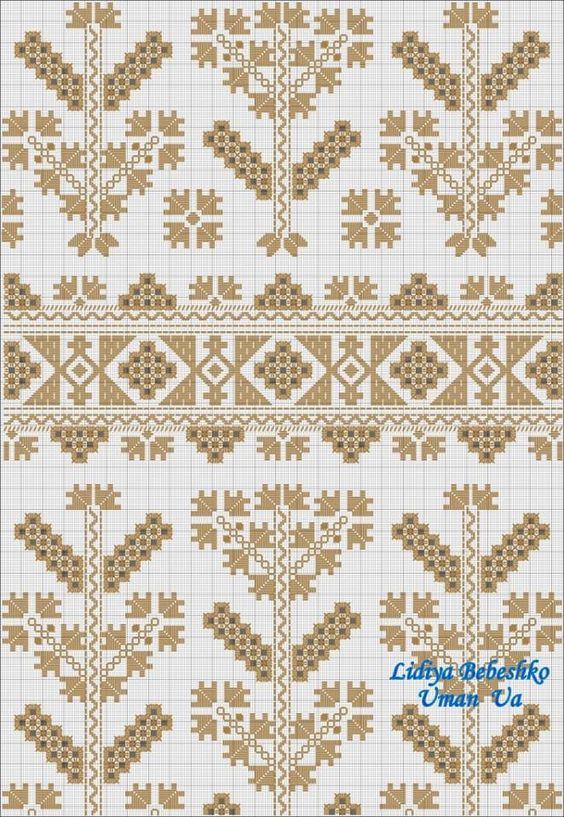
The range of possible compositions is infinite.

This kind of embroidery is most commonly used on women's, especially young women's chemises.


Sometimes older women will embroider the same type of design, but instead of cutting the holes will embroider them with black thread to make it look like they are cut, as openwork would not be seemly. This is called 'blind cutwork', [slipa vyrizuvannia]. Here is an example, shown front and back.

This technique can also be used on men's shirts.


The zigzag border on this rushnyk is highly unusual, and shows influence from Hardanger embroidery.

It is the custom in Ukrainian homes to have embroidered cloths on tables and other furniture, often they set off other pieces of folk art, as here.

While the original embroidery was done in white on white, sometimes it would be done with threads coated with soot, or beeswax, to give a gray or pale gold color. These pale colors, also including light blue, are now more widespread. This chemise was embroidered in 1968.

This chemise above shows the typical arrangement of embroidery on a chemise. There is a horizontal band of embroidery on the shoulder inset, The sleeve itself is usually gathered into the inset in the center, as you can see above. The upper sleeve often has another band of horizontal embroidery echoing the one on the inset, as you can see here. This is not always the case. There is a band on the bottom hem, which always shows below the overskirt; in this case the garment is folded up to show the embroidery. There are also narrow bands of embroidery on the cuffs, collar and front opening. The lower sleeves may be left plain, or have vertical bands of embroidery as shown here, or may be covered with a reticulated or spotted design. The chemise on the right in this image was done in hemstitching. Such horizontal bands on the lower sleeve are known, but unusual.

One common motif used for the lower sleeves is a zigzag line, which is called lomane derevo, or 'broken tree'.


The black used with the cutwork here is unusual, the pale color on the right is much more typical. The hem of the chemise on the right is in the upper left corner.

Household linens in various colors; again the threads catch the light differently when viewed vertically or horizontally.


Thank you for reading, I hope that you have found this to be interesting and informative. I also hope that this has inspired you to try this type of embroidery; it is an important part of our cultural heritage that deserves to live on. I hope that the examples given have given you a good idea of the compositional possibilities. Here are just a few more.


These two images show examples which are not from Poltava, but from Rivne in Western Podillia.


email: rkozakand@aol.com
Possibly the best illustrated step by step instructions for this technique can be found in 'Ukrainian Embroidery Techniques' by Tania Diakliw Oneill.
Source Material:
Maria Kutsenko, 'Ukrainian Embroideries', Melbourne, 1977
Kmit and Luciow, 'Ukrainian Embroidery', New York, 1978
Bilozub et al, 'Ukrainian Folk Art, Weaving and Embroidery', Kyiv, 1960
Tetiana Kara-Vasylieva, 'Ukrajins'ka Sorochka', Kyiv, 1994
Tetiana Kara-Vasylieva, 'Ukrajins'ka Vyshywka', Kyiv, 1993
Olena Kulynych-Stakhurska, 'The Art of Ukrainian Embroidery', L'viw, 1996
Towstukha et al, 'Handicrafts in the Ukraine', Kyiv, 1979
Belokur et al, 'The Ukr. SSR State Museum of Ukrainian Folk Decorative Art', Kyiv, 1983
E. Lytvynets', 'Ukrajins'ke Narodne Mystetsvo - Vyshyvannia i Nanyzuvannia', Kyiv, 2004
Bitustøl Torbjørg, 'Hardangersøm' Utgitt av Husfliden Stavanger
Thanks for highlighting the differences between Ukrainian and Hardanger cutwork Roman. I do admire Hardangersaum in its original form, and I'm sorry that its name is applied now to work that is quite coarse and usually (in my opinion) ugly. Ukrainian cutwork is beautiful, though I much prefer it in white.
ReplyDeleteThank you so much for this wonderful survey of Ukrainian cutwork - I want to try this on a costume....do you know how old this technique is?
ReplyDeleteI do not, It is not my field of study, and in any case, the history of embroidery can only be studied indirectly. I am certain that it dates back at least to the Renaissance, and it predates similar techniques such as Richelieu
DeleteThank you for the great work researching and analyzing this technique. I believe, one of the pictures shows the different technique than described in the article: the second from the bottom, cutting in blue, looks more like "eyelets" (solov'jini vichka) to me, rather than Poltava cutwork. Thanks again for your work and this wonderful blog!
ReplyDeleteGood work.
ReplyDelete